3. Getting Started#
In this chapter we show how to build a 3D model from a small set of photos. It’s a good idea to follow these instructions if you’re new to Photogrammetry or if you’ve never used Beholder Desktop before as it allows you to quickly build a 3D model from a known good set of photos and to confirm that Beholder Desktop is working correctly on your computer.
Obtaining Photos to be Aligned#
You can obtain a set of photos to use in this tutorial from https://beholder.vision/data/tutorials/getting-started/lion.zip.
Add Images to the Project#
Once you have a set of photos to use you can add the images to the project either by dragging them from your computer onto the image list section on the left, or by clicking in the ‘Click here to add images’ box.
Start to Align Images#
Start the ‘align images’ process by clicking on the align images button. This step will work out the position and orientation that the camera was in for each of the photos that have been added to the project. Once complete you will end up with a point cloud that provides an early preview of the object you’re building.
Adjust the Pose of the Point Cloud#
After the point cloud has been built, you may find that it is the wrong way up, or posed at an odd angle. You can fix this by using the translation and rotation tools to adjust the pose of the point cloud.
Click on the ‘adjust rotation’ button and then drag the 3D circles to rotate the point cloud.
Click on the ‘adjust translation’ button, and then drag the 3D axes to move the point cloud.
Start to Construct the Mesh#
Once you’re happy with the initial point cloud built by Beholder, and you’ve adjusted its pose, you can build a 3D mesh by clicking on the construct mesh button.
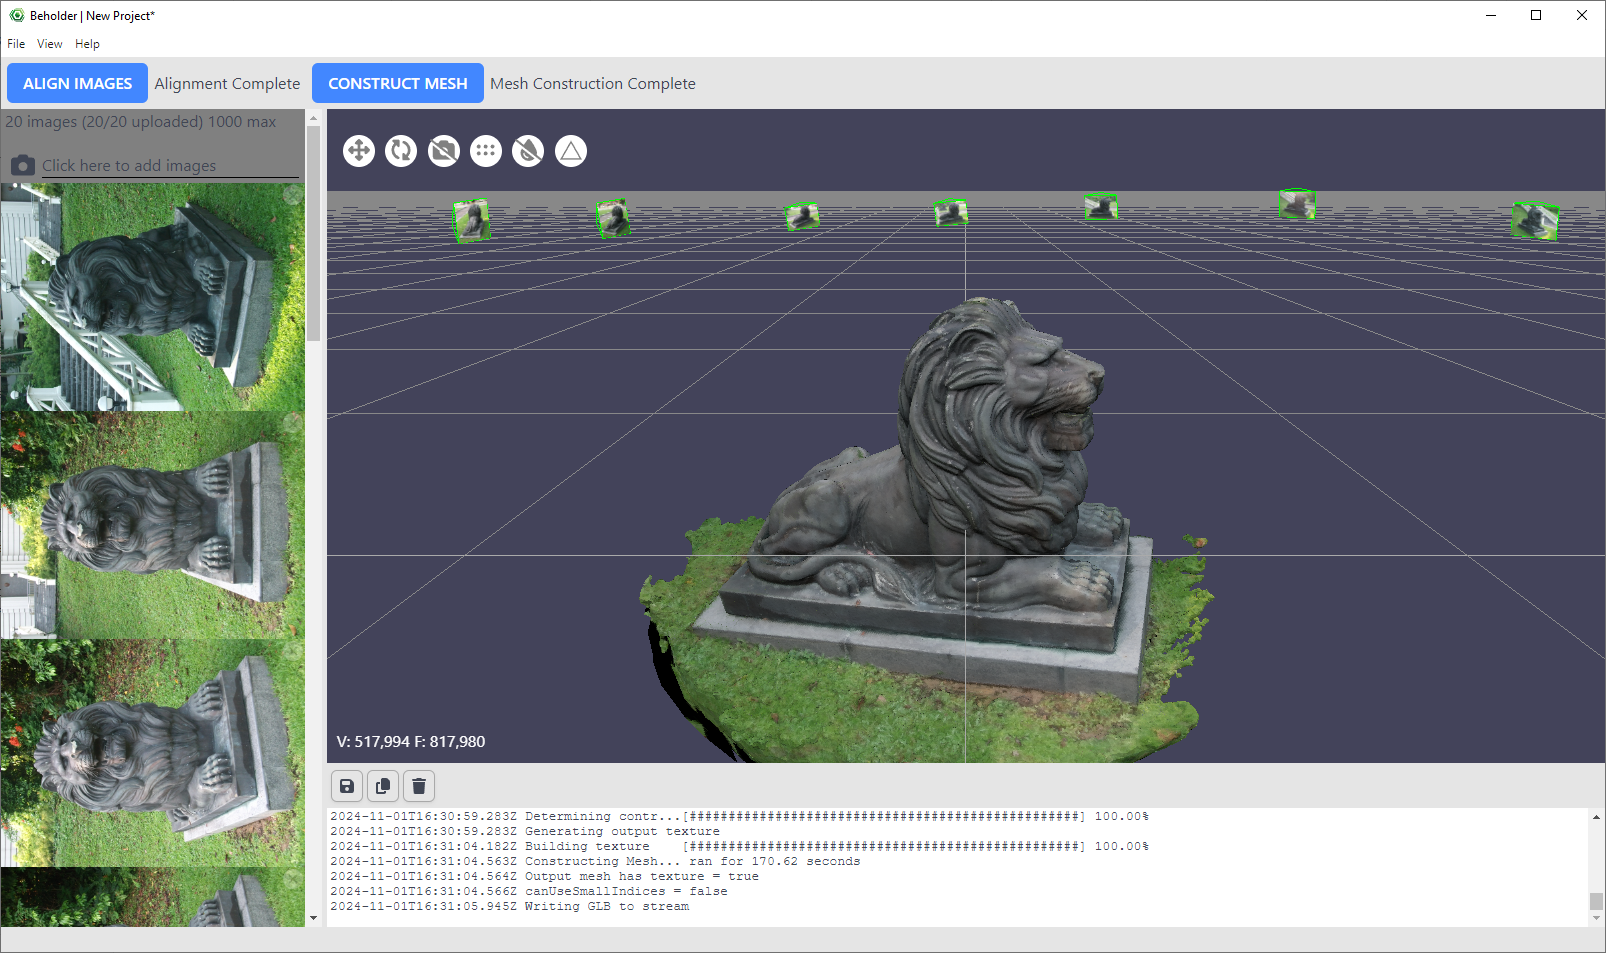
Once the construct mesh process is complete you should see a 3D model like this.#
Extra: Focus Reconstruction Area with a Bounding Box#
The area to be reconstructed when constructing a mesh will be calculated automatically, but it’s also possible to specify the reconstruction area manually. This can be useful if you want to exclude parts of the scene from the final 3D model or if you’re only interested in part of the 3D geometry.
To setup the bounding box, switch to point cloud mode, press the button to add in a bounding box and then use the bounding box control points to specify the position and size of the bounding box.
Next Steps#
Once the construct mesh process has finished. You can save the project for later use and you can also export the 3D model for use outside of Beholder Desktop.